3 Artisan Sketched Garden Pop-Up Card Ideas Using Designer Paper
The Artisan Sketched Garden Designer Series Paper is packed with beautiful floral patterns that practically do the designing for you. If you're looking for creative ways to showcase this paper collection, these three pop-up card ideas are a great place to start.
Today I'm sharing a trio of fun fold card designs that each use the same products but create completely different looks. From a simple pop-up panel card to a floating vase design and an accordion-style display card, these projects prove how versatile a single paper collection can be.
Each card features the Artisan Sketched Garden Designer Series Paper, Fern & Flora 3D Embossing Folder, coordinating sentiments, and a touch of shimmer for added elegance. Whether you're making birthday cards, thinking-of-you cards, or everyday greetings, these designs are easy to customize for any occasion.
Watch the video tutorials below for step-by-step instructions, measurements, and assembly tips for all three cards.
Stampin’ Up! Supplies Used For All Three Pop Up Cards
Artisan Sketched Garden DSP Item #167752
Barely Blush Cardstock Item #167689
Barely Blush Two-Tone Cardstock Item #167697
Basic Black Cardstock Item #121045
White Cardstock Item #166780
Fern & Flora 3D Embossing Folder Item #167744
Phrases & Frames Stamp Set Item #167581
Rectangle Punch Item #167880
2026-2028 In Color Dots Item #167546
Shimmer Brushes :
Crisp Cantaloupe Shimmer Brush Item #167661
Hydrangea Hue Shimmer Brush Item #167663
Barely Blush Shimmer Brush Item #167664
Peaceful Pine Shimmer Brush Item #167665
Golden Glow Shimmer Brush Item #167662
Artisan Sketched Pop Up Card Tutorial #1
Artisan Sketched Pop Up Card Tutorial #2
Artisan Sketched Pop Up Card Tutorial #3
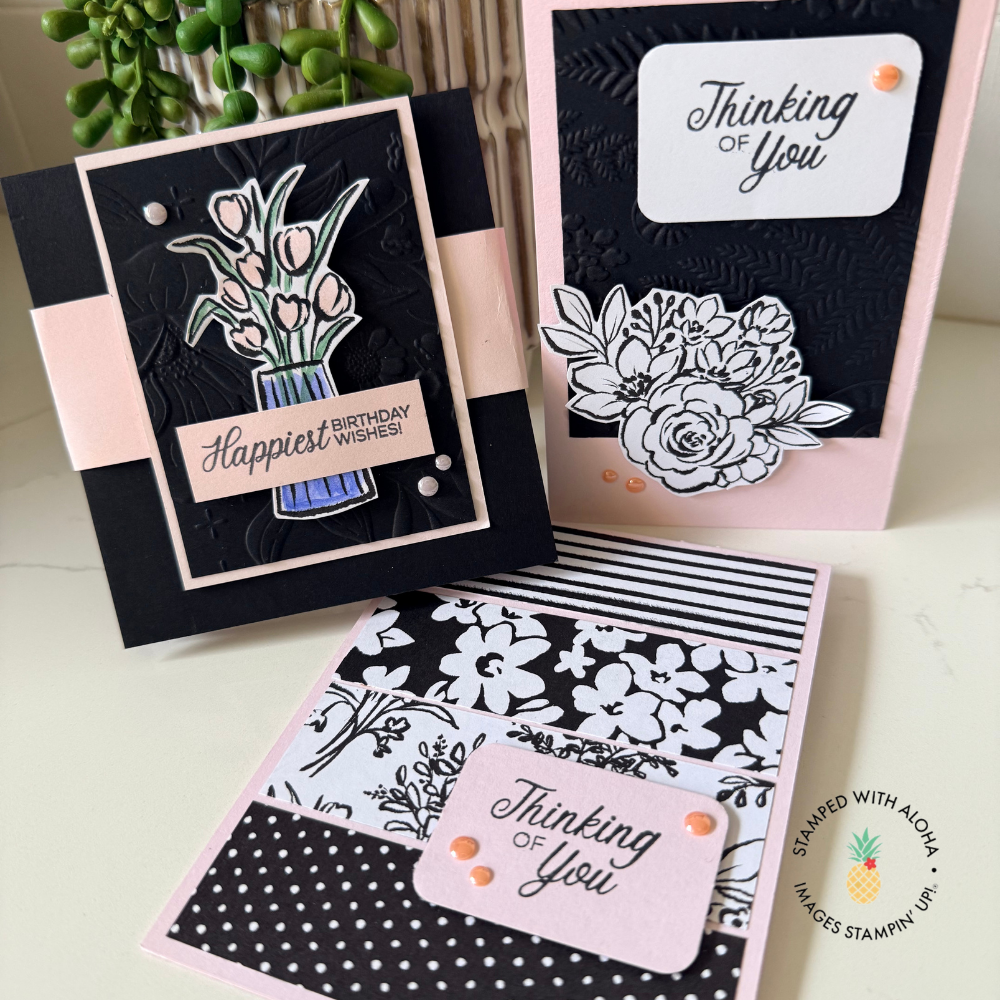
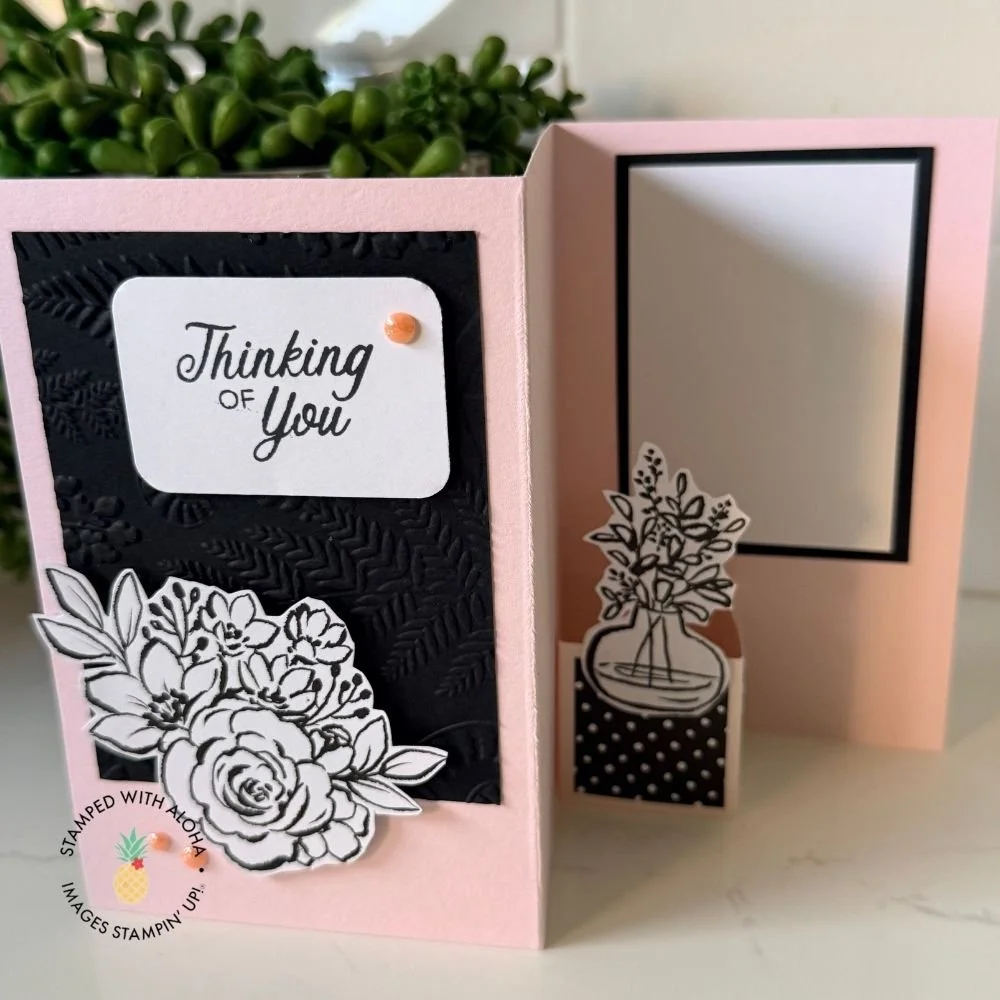
Pop-Up Card #1: Easy Designer Paper Pop-Up Card
This first design creates a simple pop-up display inside the card that beautifully showcases the floral vase images from the Artisan Sketched Garden Designer Series Paper. The layered designer paper panels on the front add interest while keeping the card easy to recreate.
Card 1:
1) Card Base: Barely Blush 4-1/2” X 11” Score at 5-1/2”
2) Barely Blush Two Tone Cardstock 4” x 10-3/4”
a) Make 2 vertical cuts about 1” from each (Left & Right) bottom edge that is about 3/4” long
b) Glue into the card base.
3) Cut 4 pieces of DSP 1-1/4” x 4”
4) Barely Blush cardstock scrap punch a rectangle with Rectangle punch
5) Phrases & Frames Stamp set to stamp sentiment
6) Use 2026-2028 In-Color Embellishments
Inside of card:
1) Barely Blush Two Tone Cardstock cut 3” x 4”
2) Black Cardstock 2-3/4” x 3-3/4” Emboss with Fern & Flora 3D Embossing Folder
3) Cut a flower vase from the designer series paper.
4) On White cardstock 3/4” x 2-1/2” stamp sentiment
5) Shimmer Brushes to color flowers (optional)

Artisan Sketched Easy Pop Up Card (Front View)
Artisan Sketched Easy Pop Up Card (Inside View)
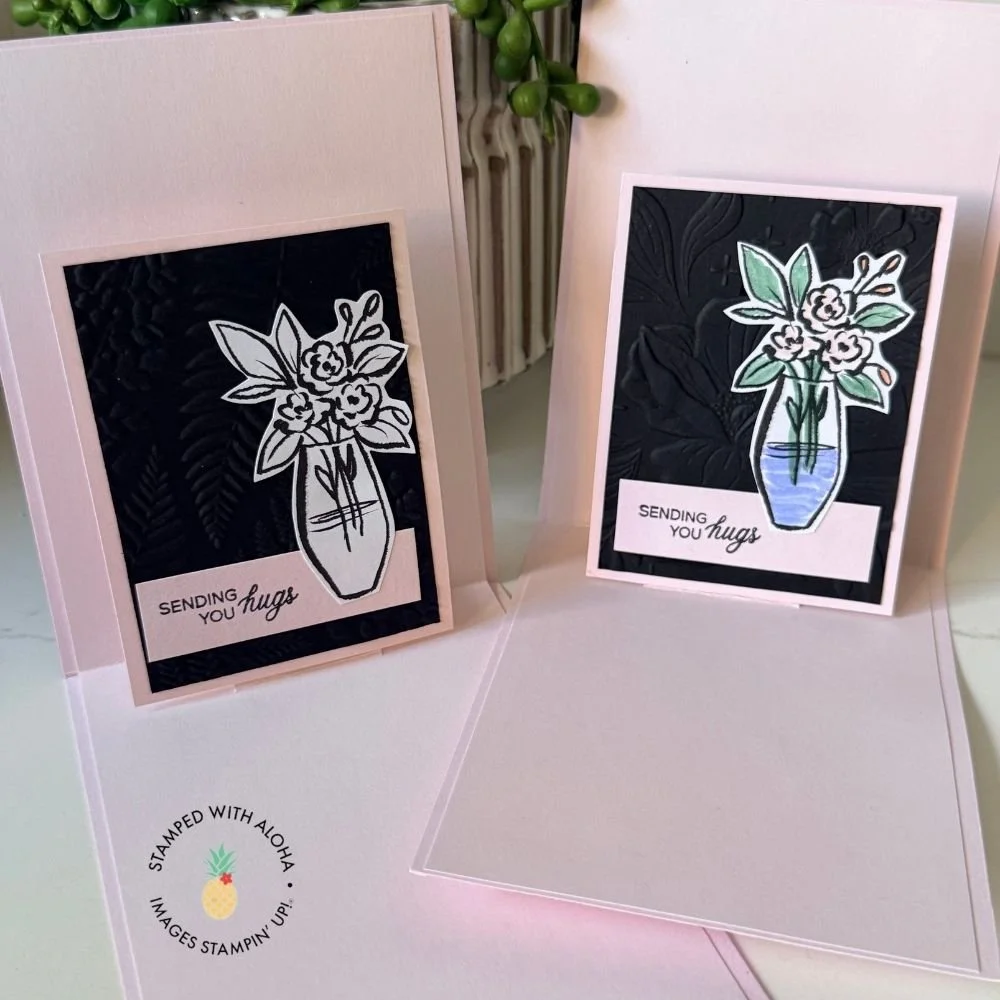
Pop-Up Card #2: Floating Vase Pop-Up Card
The second card features a clever pop-up mechanism that allows the floral vase image to stand and float when the card is opened. This interactive design creates a fun surprise while still using simple supplies and measurements.
Card 2:
Barely Blush card base 5-1/2” x 10-1/2” score at 3-1/2”, & 7”. Fold Base
Barely Blush Two Tone Cut 1-1/2” x 6” score at 1-1/2”, 3”, and 4-1/2”. Fold and place mechanism as shown in video (1:26 time mark)
Inside cardstock layered panel —> Cut White cardstock at 2-1/4” x 3-1/4”
Cut Black cardstock at 2-1/2” x 3-1/2”Black cardstock 3” x 4” embossed with Fern & Flora 3D Embossing Folder
Cut Flower and add dimensionals. Place on lower left of the black cardstock
Stamp sentiment on Frame
Add Embellishments—2026-2028 In-Color Dots (Crisp Cantaloupe)
Inside of card:
Cut 2 Designer Paper 1-1/4” x 1-1/4” and place on sides of pop-up mechanism
Cut flower pot from DSP. Attach vase to Pop-up (add shimmer brush for color if desired)
Artisan Sketched Pop Up Card #2 (Front + Inside View)
Pop-Up Card #3: Accordion Pop-Up Birthday Card
The final card uses an accordion-fold interior filled with coordinating designer paper squares. This dimensional design creates a dramatic display when opened and folds flat for mailing, with a matching belly-band closure.
Card 3:
Black cardstock 4-1/4” x 9” — Fold in half
Barely Blush Two-tone cardstock cut TWO 4” x 9” score both pieces at 1-1/2”, 3”, 4-1/2”, 6”, and 7-1/2”
a) Fold into an accordion fold (see video 2:00 min mark) and glue together
b) Cut (14) 1-1/4” x 1-1/4” and glue the squares 3 in a row as shown in the video and adhere to the card base (3:50 min video mark)Stamp sentiment on white cardstock 3/4” x 3”
Make Belly Band- Barely Blush cardstock 1-1/2” x 10-1/2”. Wrap the strip around the card—not too tight but enough to hold it. Glue the ends together and place 2 dimensionals on the seam for added security.
Black cardstock 2-3/4” x 3-3/4” Emboss with folder and then adhere to the Barely Blush cardstock 3” x 4”
On a barely blush 3/4” x 2” stamp sentiment.
Cut floral vase from designer paper and adhere to the front card panel with sentiment in the middle on top of that.
Adhere embellishments (Barely Blush color)
Color image with shimmer brushes if desired.

Artisan Sketched Accordion Pop-Up Birthday Card
Which Artisan Sketched Garden Card Is Your Favorite? Let me know in the comments!
One of the things I love most about this collection is how each card design feels completely different despite using the same papers, colors, and embellishments. It's a great reminder that a single paper collection can inspire dozens of unique cardmaking ideas.
Whether you prefer the simple pop-up card, the floating vase design, or the accordion display card, I hope these projects inspire you to pull out your Artisan Sketched Garden Designer Series Paper and start creating.
With love and blessings,
Cindy 🌺